You are in a tense match. You line up a shot, but your crosshair drifts to the left on its own. You miss.
This is called "stick drift," and it is the worst nightmare for any gamer. Most people think their controller is broken and go buy a new one. But often, the hardware is fine. The problem is the software settings.
This Software Calibration Guide will help you fix your controller without spending money. We will look at the two main ways to calibrate on PC: the Windows Calibration tool and the Steam Calibration settings.
Let’s figure out which one fixes your specific problem.
Why You Need a Software Calibration Guide
Controllers are mechanical. Over time, the springs wear out and the sensors get dusty. This means the "center" of your joystick might shift slightly.
Calibration tells your computer where the new center is. It also sets "deadzones." A deadzone is a small area in the middle of the stick where the computer ignores input. If your stick is a little loose, a deadzone stops it from drifting.
But here is the confusing part: Windows has its own calibration, and Steam has its own too. If you use them wrong, they can fight each other.
Step 1: Testing Before You Start
Before changing any settings, you need to see exactly what is wrong. You need a neutral judge. If you jump straight to fixing it, you are guessing. Use our Online Gamepad Tester first.

- Connect your controller.
- Move the sticks in circles.
- Look for "jitter" (shaking dots) or "drift" (dots moving when you aren't touching the stick).
Check the Error Rate:
If the error rate is very high (over 15%), you might have a broken part. If it is low (under 10%), this Software Calibration Guide will likely fix it.
Launch Tester ToolMethod A: Using Windows Calibration (`joy.cpl`)
Windows has a hidden tool built specifically for this. It is called joy.cpl. This tool works at the system level. This means the changes apply to every game you play, whether it is on Steam, Epic Games, or an emulator.
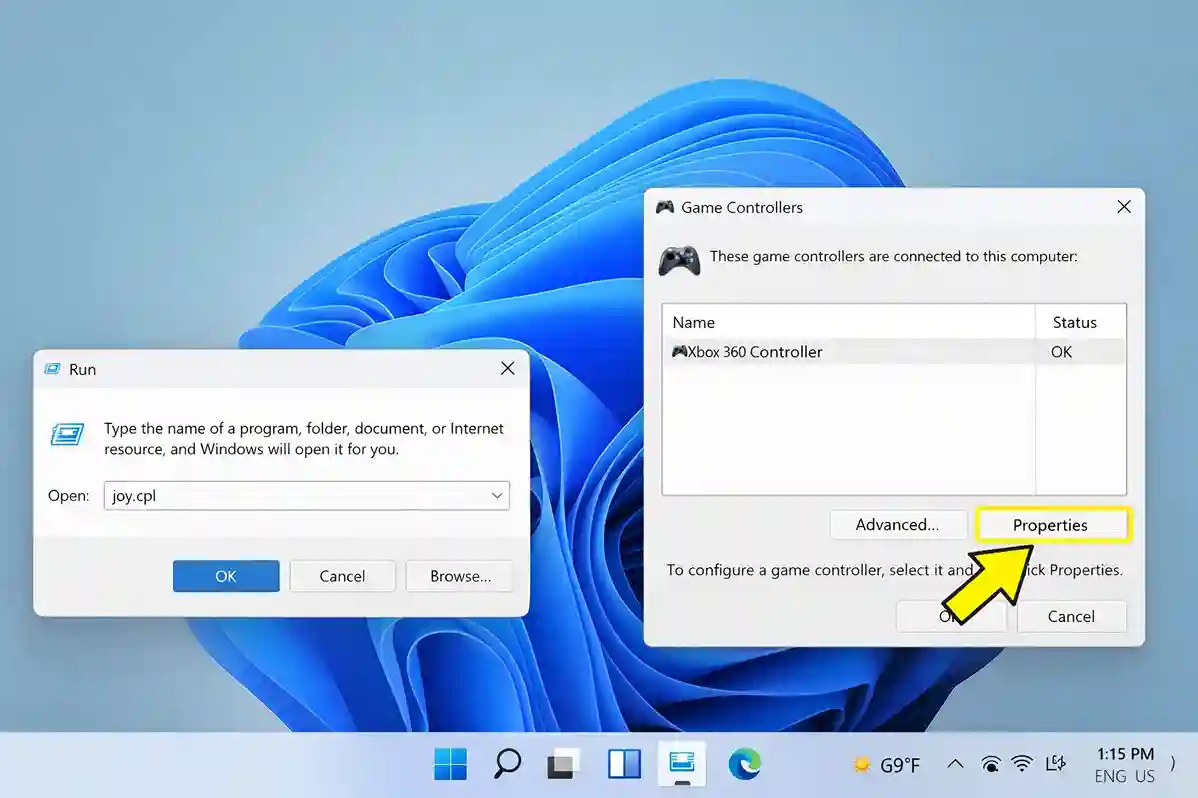
How to run the Windows Software Calibration:
- Press the Windows Key + R on your keyboard.
- Type
joy.cpland hit Enter. - Select your controller and click Properties.
- Click the Settings tab and then Calibrate.
Follow the wizard. It will ask you to rotate the sticks and press buttons. You can read more about Windows input standards on Microsoft’s Official Documentation.
Warning: Do not touch the sticks while the tool is opening. This can mess up the "zero" point.
Method B: Using Steam Calibration (Steam Input)
Steam handles controllers differently. It uses "Steam Input." This sits on top of Windows and can override it. Steam allows for much more detail, like changing the shape of your deadzone from a circle to a square.
How to access Steam Software Calibration:
- Open Steam and go to Settings.
- Click on Controller.
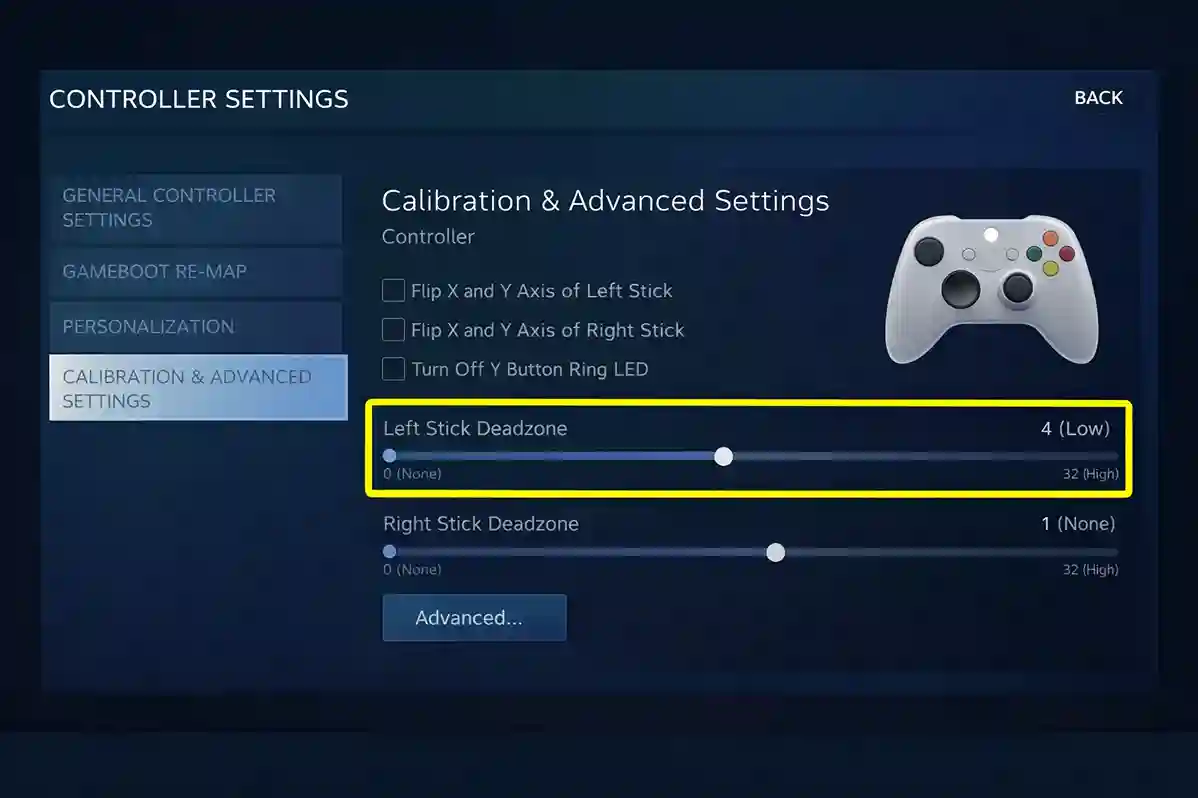
- Look for Calibration & Advanced Settings.
- Click Open.
Here, you can increase the "Left Stick Deadzone." If your character walks on their own, bump this slider up slightly until it stops.
Comparison: Windows vs. Steam Calibration
How do you know which one to pick? This table breaks it down.
| Feature | Windows Calibration | Steam Calibration |
|---|---|---|
| Scope | System-wide (All apps) | Steam Games Only |
| Best For | Emulators, Game Pass, Epic | Steam Library, Customization |
| Deadzone Control | Basic | Advanced (Shape & Size) |
| Risk | Low | Medium (Conflicts) |
The Rule of Thumb: If you play games on many different launchers (like Battle.net or Xbox App), use Windows Calibration. If you only play on Steam, use Steam Calibration.
The Conflict: Can Using Both Break Your Aim?
Yes. This is the most important part of this Software Calibration Guide.
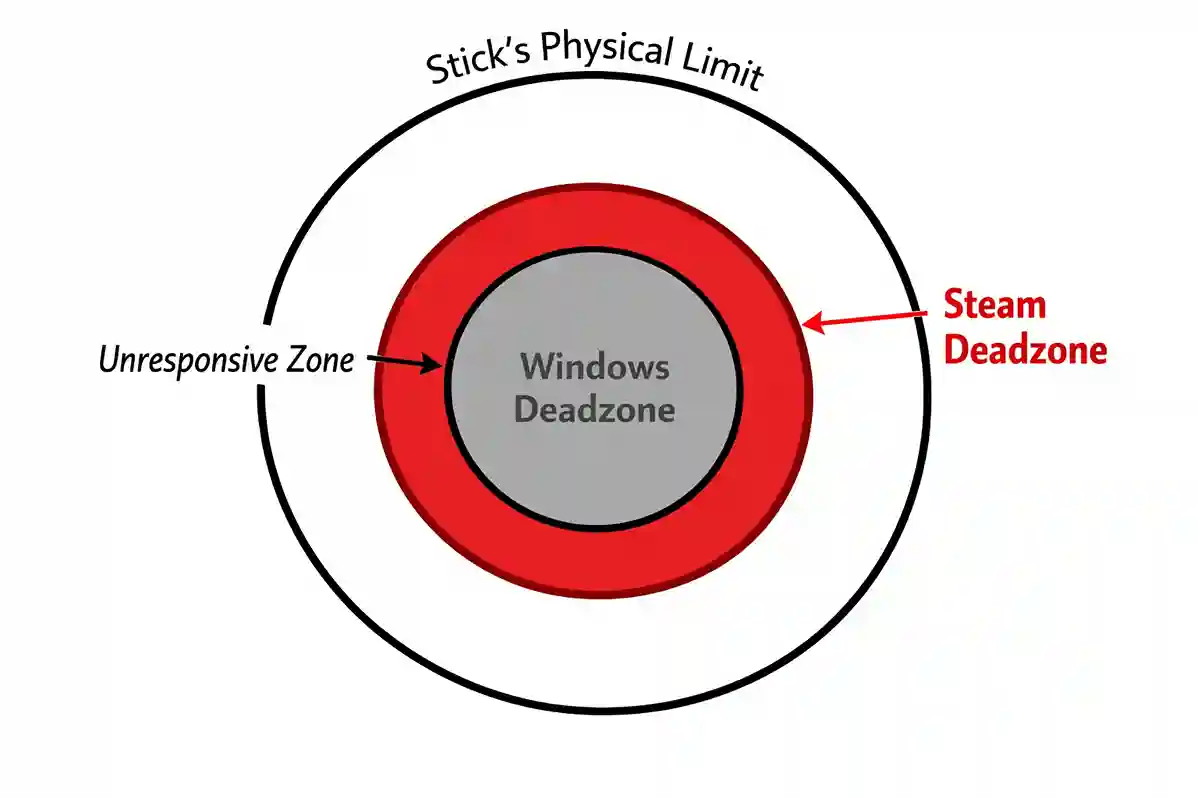
Imagine your stick is slightly loose.
1. You set a deadzone in Windows so it ignores the first 10% of movement.
2. Then, you open Steam and set another deadzone of 20%.
Now, you have to move your stick 30% of the way before the game reacts. Your controller will feel heavy and unresponsive. This is called "stacking deadzones."
How to Reset Your Software Calibration
If your controller feels worse after trying to fix it, you should reset everything.
- Open the
joy.cpltool again. - Go to the Settings tab.
- Click Reset to Default.
This clears out the old data so you can start fresh.
FAQ: Common Questions
Does calibrating in Windows affect my aim assist?
No, calibration only tells the computer where the stick is. It does not change how the game’s aim assist works. However, fixing drift can make your aim assist feel stickier because you aren't fighting the camera movement.
Why does my controller drift in one game but not another?
This is usually a "deadzone" issue. Some games (like Call of Duty) have very small default deadzones, so they detect tiny movements. Other games have large deadzones. Use the Steam method to set a per-game deadzone for the sensitive ones.
Can software fix a broken analog stick?
Software can hide the problem, but it cannot fix broken plastic or sensors. If you have to set your deadzone to 50% to stop the drift, it is time to buy a new high-performance controller.