Your controller is dead. You plugged it in, but the orange light didn't pulse. Now you can't play. I know how annoying this is.
Most people assume their controller is broken forever. That is rarely true. Usually, the issue is just a dusty port or a bad cable. Even if the charging port is physically broken, you have options before spending $75 on a new DualSense.
This guide covers everything about PS5 USB-C repair. We will cover simple 60-second checks, the "charging dock hack" that saves you money, and full repair instructions.
Quick Tip: If you are unsure about soldering, jump straight to the "EXT Port Hack" section to fix your charging issue without tools.
Basic PS5 USB-C Repair Checks (Try These First)
Before we talk about tools or soldering, we must rule out the easy fixes. Do not skip this section.
Check Your Cable Type
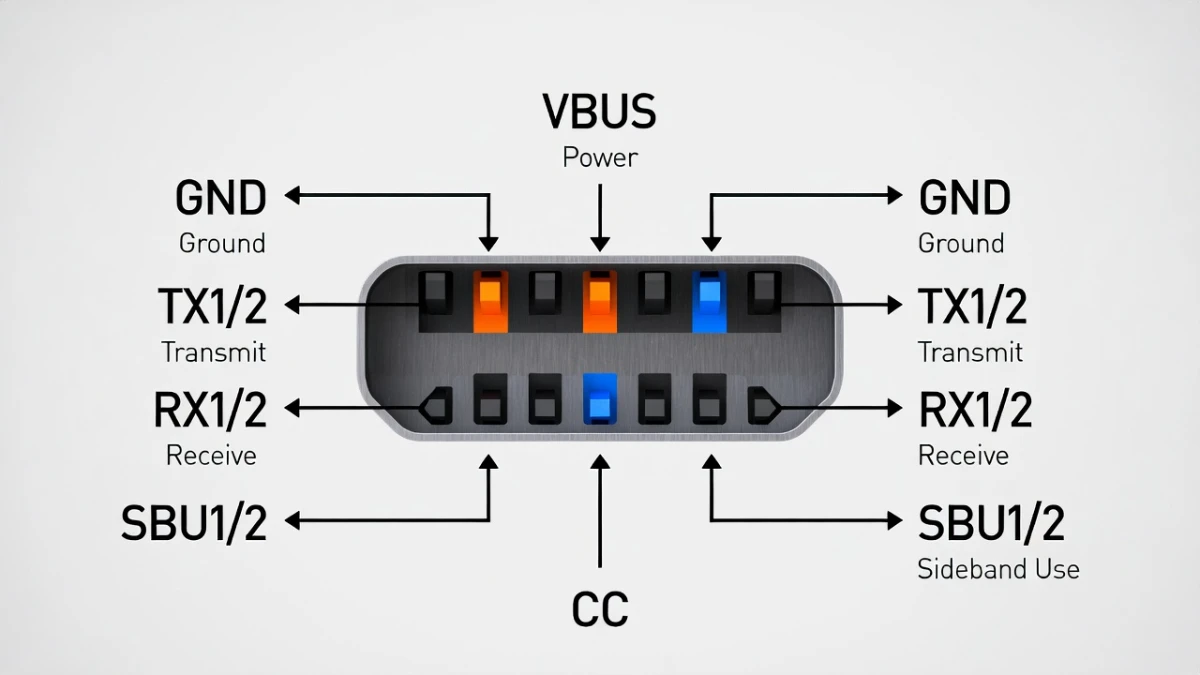
Not all USB-C cables are the same. Some are designed only for power. Others handle data too. The PS5 requires a data connection to perform a "handshake." Without this, it will not charge properly.
- The Test: Try the cable that came with your smartphone. If that works, your original cable is bad.
- The Fix: Buy a certified USB-C data cable.
The "Wiggle Test" for PS5 USB-C Repair
This test helps you identify a loose port.
- Plug the cable into the controller.
- Gently wiggle the connector up and down.
- Watch the light bar.
Result: Does the orange light flicker on and off while you wiggle it? If yes, the solder joints inside are cracked. You need a hardware repair or a workaround.
Hard Reset the Controller
Sometimes the software freezes.
- Flip the controller over.
- Find the small hole next to the Sony logo.
- Use a paperclip to press the button inside for 5 seconds.
- Reconnect the controller to the console.
PS5 USB-C Repair Alternative: The "EXT Port" Hack
If your USB-C port is definitely broken (loose or smashed), you might think you have to solder a new one. You don't.
There is a second charging port on the bottom of the controller. It is called the EXT port. It sits right between the headphone jack and the mute button.
- The Solution: Buy a drop-in charging dock that uses the bottom EXT port.
- Why this works: These docks bypass the top USB-C port entirely. Even if the top port is destroyed, the bottom port will still charge the battery.
- Cost: A good dock costs about $15-$20. This is much cheaper than a repair shop or a new controller.
Why this matters:
Most people buy a new $75 controller because of a 50-cent broken port. The $15 charging dock saves you $60 and keeps your controller out of the trash.
Do You Need a PS5 USB-C Repair or a Battery Replacement?
How do you know if the port is bad or if the battery is dead?
Symptoms of a Bad Battery:
- The controller charges to 100% but dies in 30 minutes.
- The controller works fine when plugged in but dies instantly when unplugged.
Symptoms of a Bad Port:
- The controller never shows the orange charging light.
- The controller does not connect to the PS5 for updates.
- You see visible damage or bent pins inside the USB-C hole.
The Hardware PS5 USB-C Repair Process (Advanced)
If you have the skills and want to physically replace the port, read this section.
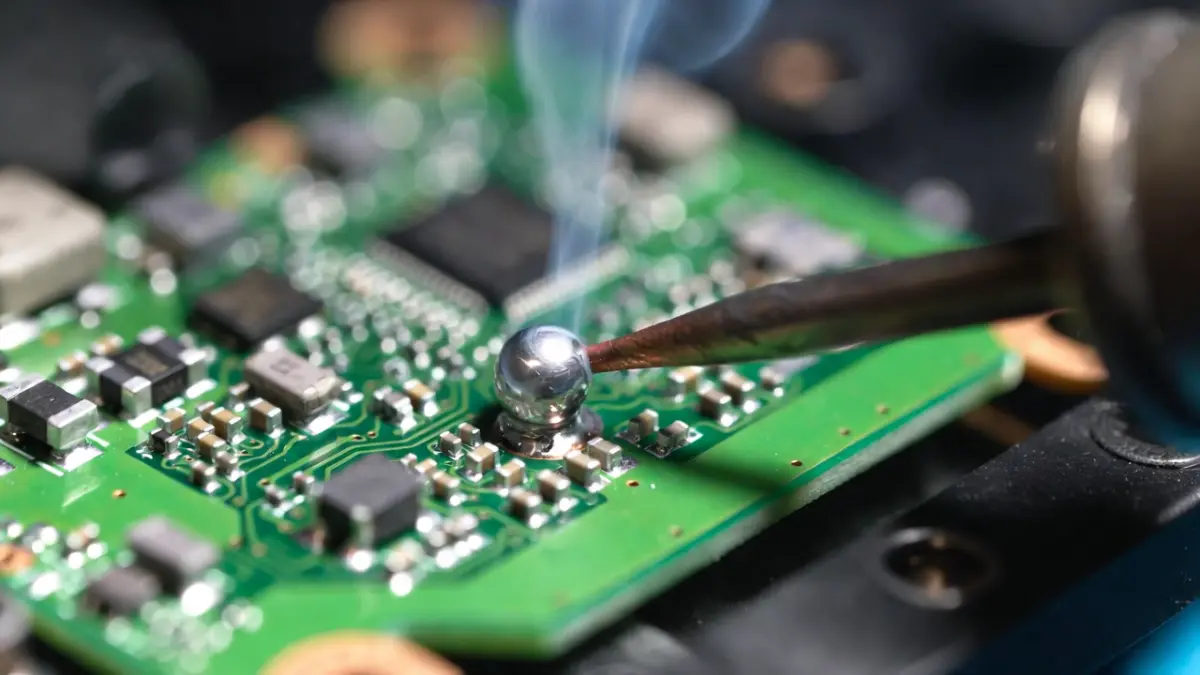
Warning: The USB-C port on the DualSense is soldered to the main board. You cannot fix this with a standard soldering iron. You need a hot air station to melt all the pins at once.
Tools for PS5 USB-C Repair
- Hot Air Rework Station
- Flux (essential for smooth solder flow).
- Low-melt solder
- Replacement USB-C port (specific to DualSense model)
The Steps
- Disassemble: Remove the back shell, battery, and motherboard.
- Protect: Use Kapton tape to cover plastic parts near the port. This prevents them from melting.
- Desolder: Apply flux. Heat the port until it lifts off. Do not pull hard, or you will rip the pads.
- Install: Clean the pads with wick. Apply fresh solder paste. Heat the new port into place.
Is Professional PS5 USB-C Repair Worth the Cost?
Should you fix it yourself, pay a pro, or buy new? Let’s look at the numbers.
| Option | Estimated Cost | Difficulty | Verdict |
|---|---|---|---|
| Buy Charging Dock (Workaround) | $15 - $20 | Very Low | Best Value. Fix without tools. |
| DIY Port Replacement | $5 (Port) + $100 (Tools) | Very High | Only if you already own tools. |
| Professional Repair Shop | $35 - $50 | Low | Good if you love this specific controller. |
| Buy New Controller | $70 - $75 | Low | Easiest but most expensive. |
PS5 USB-C Repair FAQs
Can I do a PS5 USB-C repair without soldering?
No. The port is soldered to the circuit board. You cannot glue or tape a new one in. However, you can avoid the repair entirely. Use a charging dock that connects to the bottom EXT port.
How much does a shop charge for PS5 USB-C repair?
Most local repair shops charge between $35 and $50. If the price is higher than $50, you are better off buying a new controller.
Why did my PS5 charging port break?
The most common cause is "play and charge." When you play with the cable plugged in, the movement puts stress on the internal solder joints. Eventually, they crack.